Code Example, Palletizing
 In small-scale palletizing operations, teaching all the points in a tray works fine, as long as those points never change and your pallet is small. Industry has shown various palletizing applications from 16 points to thousands on a single pallet, or over multiple pallets. Where high-volume palletizing is concerned, there are 3 methods that are commonly used time and time again.
Method 1 - 3 Point Pallet (X-SEL only)
The simplest method for palletizing programming is the implementation of the new palletizing commands. These commands simplify the programming and allow a pallet to be defined by 3 taught positions. These three positions will automatically compensate for any skewness or slanted pallets. See the sample code on the left which can be downloaded for your convenience.
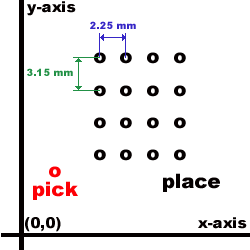
Method 2- Distance (Pitch) Control
The first method to control palletizing operations uses the uniform distance between points in the pallet matrix. In an ideal palletizing operation, the distance between columns and rows is the same, however, if they are different it's just as easy to implement this method. Here's how the method works:
(Assuming we are moving from left to right on a pallet)
* The first point on the pallet is taught.
1. The distance between columns (and/or rows) is initialized
2. (start loop)
3. The pallet point is moved to in the program.
4. The point data is incremented in the X (column) direction
5. End of row?
6. If not at end of row, loop back up to 1.
7. If at end of row, increment row
8. At the last row?
9. If not at last row, loop back up to 1.
10. If at last row, restart pallet and reset distance, or end program.
This method proves to be very flexible as the distance increment can be altered according to what pallet you are working on. If the pallet size changes, all that needs to be changed in the program is the distance amount and possibly the first point on the pallet. This code will also work on the standard SCARA units that do not have the OFST command available. The problem with this method is that the code is a bit lengthy and extra logic steps must be in place for the position control to occur properly. The next method, using OFST, results in shorter code but may not work with the SCARA (see Scara -> Palletize w/out OFST).
Method 3- Using OFST
The OFST command allows the user to define a set amount of OFST added on to all points for the moves following the issuance of the OFST command. This OFST setting can be performed on each individual axis or all axes in the system
Which axis actually receives the OFST amount in the point table is determined by the axis pattern placed in Operand 1. The OFST method minimizes code because it adds on to the point table data without actually changing the data in the point table.
For example:
MOVP 1
OFST 10 33.41
MOVP 1
The above code moves the actuators to position 1, adds on an offset in the Y plane of 33.41mm, then moves to position 1 again with an added offset of 33.41 in the Y plane. The X axis remains the same.
If the user wishes to "clear" the offset for the y-axis, the code would look as follows:
OFST 10 0
The following I/O has been chosen by the user:
- Output 304 : "On" = pneumatic z down, "Off" = pneumatic z up
- Output 303 : "On" = gripper close, "Off" = gripper open
- Input 12 : "On" = cycle start
- Input 11 : "On" = z extended, "Off" = z retracted